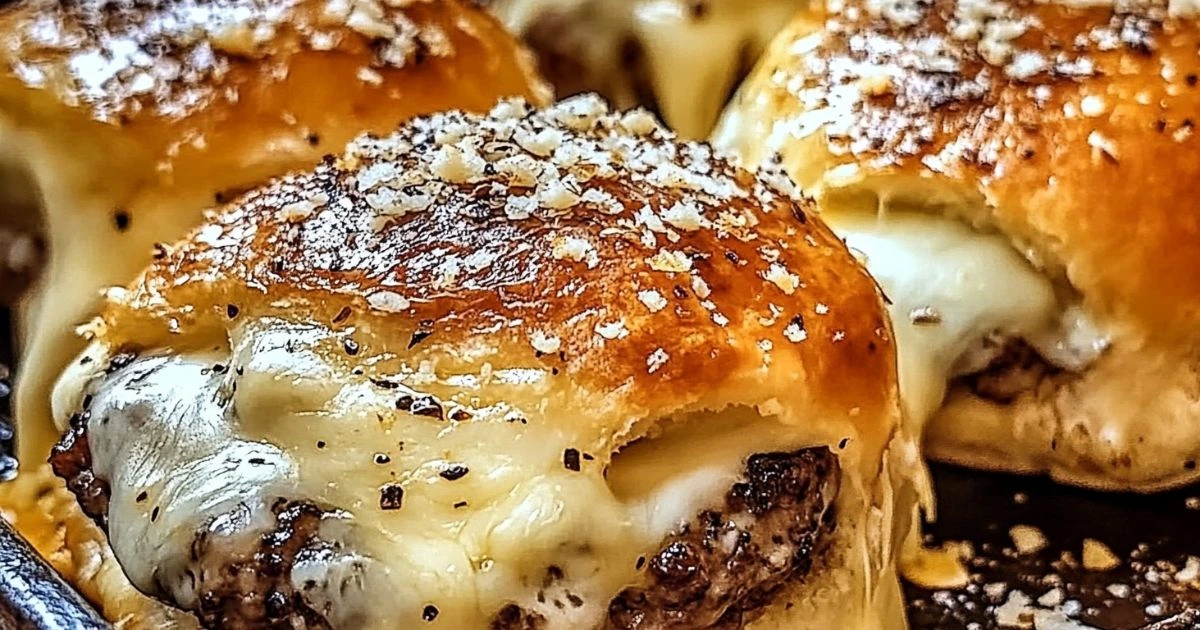
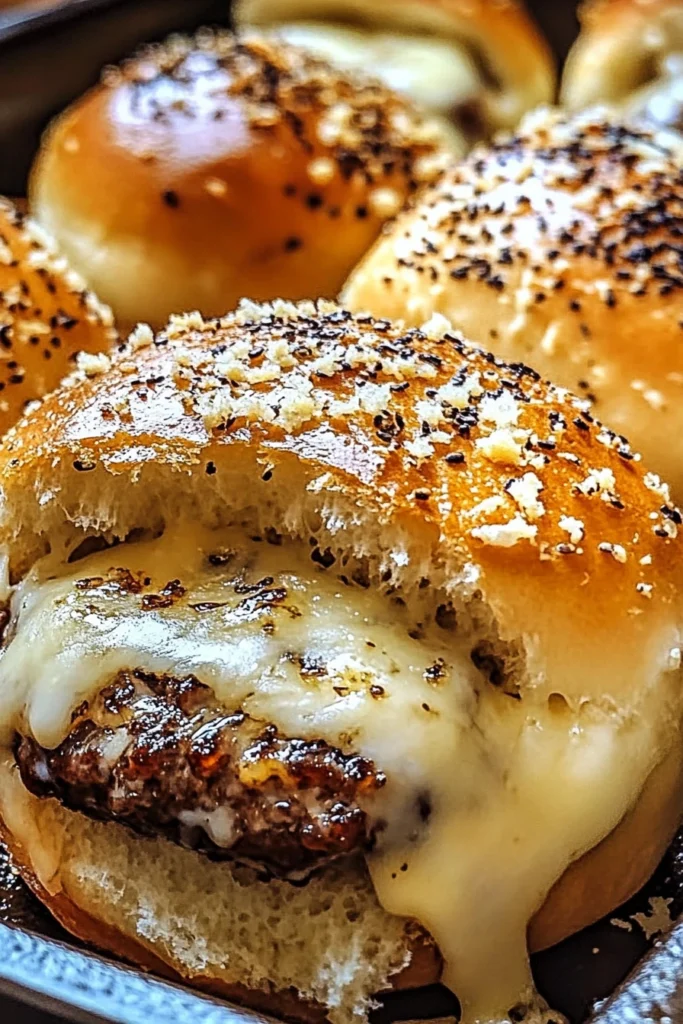
Delicious Garlic Parmesan Cheeseburger Bombs
Imagine biting into a warm, golden-brown pastry that gives way to a savory explosion of juicy seasoned beef and gooey melted cheese, all wrapped in dough that’s been brushed with rich garlic butter and sprinkled with parmesan cheese. These Garlic Parmesan Cheeseburger Bombs take everything you love about a classic cheeseburger and transform it into a handheld, mess-free delight that’s impossible to resist.
Last weekend, I made these for my brother’s game day gathering, and they disappeared faster than any other dish on the table. What started as an experiment quickly became the most requested recipe among family and friends. Whether you’re hosting a party, looking for a crowd-pleasing appetizer, or wanting to surprise your kids with a fun lunchbox treat, these cheeseburger bombs are guaranteed to impress.
In this post, I’ll walk you through everything you need to know – from the ingredients and step-by-step instructions to pro tips, variations, and serving suggestions. Let’s dive in and create some flavor bombs that will have everyone asking for seconds!
Table of Contents
What Are Cheeseburger Bombs?
“Bomb” recipes have taken the culinary world by storm – they’re essentially sealed balls of dough filled with savory ingredients that create a burst of flavor when you bite into them. These Garlic Parmesan Cheeseburger Bombs are the ultimate comfort food mashup, combining the best elements of a juicy cheeseburger with the convenience of a handheld snack.
What makes these bombs special is the combination of seasoned ground beef, melty cheese, and a mouthwatering garlic parmesan butter coating that adds an extra dimension of flavor. They’re perfect for parties because they’re portable, can be eaten without utensils, and don’t create the mess that traditional burgers might. Plus, they’re completely customizable based on your favorite burger toppings and cheese preferences.
Ingredients Breakdown
Here’s what you’ll need to make these delicious Garlic Parmesan Cheeseburger Bombs:
- Ground beef (80/20 lean-to-fat ratio works best for juicy flavor)
- Onion and garlic (finely diced to flavor the meat without overwhelming chunks)
- Cheese (Cheddar provides sharpness, while American melts beautifully – feel free to combine them!)
- Biscuit or pizza dough (Store-bought saves time, but homemade adds a special touch)
- Butter, minced garlic, dried parsley, and grated parmesan (for the irresistible topping)
- Seasonings (Salt, pepper, and a dash of Worcestershire sauce for that classic burger taste)
Optional add-ins can take these bombs to the next level: crispy bacon bits, diced pickles, jalapeños for heat, or even sautéed mushrooms. The beauty of this recipe is its flexibility – you can make each bomb unique or stick with the classic cheeseburger flavor.
How to Make Garlic Parmesan Cheeseburger Bombs (Step-by-Step)
Step 1: Cook the Beef
Begin by heating a skillet over medium heat. Add your ground beef and break it up as it cooks. When it’s about halfway done, add the finely diced onions and minced garlic. Continue cooking until the beef is no longer pink and the onions have softened. Season generously with salt, pepper, and a splash of Worcestershire sauce. If you’re feeling adventurous, add a teaspoon of mustard powder or smoked paprika for depth. Drain any excess grease, then set aside to cool slightly while you prepare the dough.
Step 2: Prepare the Dough
If using canned biscuit dough, separate each biscuit and flatten it into a 3-inch circle using your hands or a rolling pin. For pizza dough, divide it into 8-10 equal portions and flatten each into a similar-sized circle. The dough should be thin enough to wrap around the filling but thick enough not to tear easily – about ¼ inch is perfect.
Step 3: Assemble the Bombs
Place a tablespoon of the cooled beef mixture in the center of each dough circle. Top with a cube of cheese (about ½-inch cube) or a small slice. Be careful not to overfill, or your bombs might burst during baking! Now for the crucial part: bring the edges of the dough up and around the filling, pinching firmly to seal completely. Roll gently between your palms to form a ball shape and ensure there are no openings where cheese could leak out.
Step 4: Garlic Parmesan Butter Topping
In a small microwave-safe bowl, melt 4 tablespoons of butter. Add 2 cloves of minced garlic, 1 tablespoon of dried parsley, and 2 tablespoons of grated parmesan cheese. Mix well to combine. Using a pastry brush, generously coat each sealed bomb with this garlic butter mixture, then sprinkle with additional parmesan cheese for an extra flavor boost.
Step 5: Bake
Arrange your bombs on a parchment-lined baking sheet, spacing them about 2 inches apart. Bake in a preheated 375°F (190°C) oven for 15-18 minutes, or until the outsides are golden brown and the dough is fully cooked. Let them cool for a few minutes before serving – the filling will be extremely hot!
Pro Tips for Perfect Cheeseburger Bombs
- Seal thoroughly: The most common issue with bombs is cheese leakage. Make sure you’ve pinched all seams completely closed and roll the ball between your palms to ensure a good seal.
- Choose the right cheese: Block cheese cut into cubes tends to melt more slowly than shredded cheese, giving the dough time to cook before the cheese tries to escape. For best results, use cheese that melts well but isn’t too runny – medium cheddar, colby jack, or American are perfect choices.
- Make ahead option: You can prepare these bombs up to the point of baking, then refrigerate for up to 24 hours before cooking. Simply brush with the garlic butter right before baking.
- Freezer-friendly: Freeze unbaked bombs on a baking sheet until solid, then transfer to a freezer bag for up to 3 months. When ready to bake, add 5-7 minutes to the baking time (no need to thaw first).
- Reheating leftovers: For the best texture when reheating, use an air fryer at 350°F for 3-4 minutes. Microwave reheating works in a pinch (30-45 seconds), but the exterior won’t be as crispy.
Serving Ideas & Meal Pairings
These Garlic Parmesan Cheeseburger Bombs are incredibly versatile when it comes to serving options:
For dipping sauces, offer a selection of ketchup, mustard, ranch dressing, BBQ sauce, or a special garlic aioli. Each creates a different flavor experience that mimics various burger styles.
Make it a meal by serving alongside crispy french fries, sweet potato fries, or tater tots. For a lighter option, a simple side salad with ranch dressing or tangy coleslaw provides a refreshing contrast to the rich bombs.
These bombs are perfect for game day spreads, potluck contributions, or even school lunches (just be sure they’ve cooled completely before packing). For parties, consider setting up a “burger bomb bar” with various dipping sauces so guests can customize their experience.
Recipe Variations
Once you’ve mastered the basic recipe, get creative with these tasty variations:
- Bacon Cheeseburger Bombs: Mix crispy bacon bits into the beef mixture or place a small piece of bacon alongside the cheese cube.
- Mushroom Swiss Bombs: Sauté finely chopped mushrooms with the beef and substitute Swiss cheese for a completely different flavor profile.
- BBQ Beef Bombs: Add a tablespoon of your favorite BBQ sauce to the meat mixture and use smoked gouda or cheddar for the cheese.
- Jalapeño Popper Bombs: Add diced jalapeños to the filling and use cream cheese along with cheddar for a spicy kick.
- Vegetarian Version: Substitute the beef with plant-based ground meat alternative, black beans, or finely chopped mushrooms seasoned just like the meat.
Frequently Asked Questions
Can I make these in an air fryer? Absolutely! Preheat your air fryer to 350°F and cook for 8-10 minutes until golden brown. You might need to work in batches depending on the size of your air fryer.
What dough works best? While refrigerated biscuit dough is the quickest option, pizza dough creates a slightly chewier texture that many prefer. You can even use crescent roll dough in a pinch, though it creates a flakier exterior.
How do I store leftovers? Store cooled bombs in an airtight container in the refrigerator for up to 3 days. For best results when reheating, use an air fryer or toaster oven rather than a microwave.
Can I prep these ahead for a party? Definitely! You can assemble them completely, cover with plastic wrap, and refrigerate for up to 24 hours before baking. Alternatively, you can bake them ahead of time and reheat in a 350°F oven for 5-7 minutes just before serving.
Final Thoughts
These Garlic Parmesan Cheeseburger Bombs represent everything that makes food fun – they’re creative, customizable, and bring people together with every bite. I love watching guests’ faces light up when they discover the gooey, savory center hidden within that golden, garlic-parmesan exterior.
Don’t be surprised if these little flavor bombs become a regular request at your gatherings! They’ve certainly earned a permanent spot in my recipe collection for those occasions when I want to impress without spending hours in the kitchen.
Have you tried making cheeseburger bombs before? I’d love to hear about your favorite variations or topping combinations in the comments below! And if you make this recipe, please snap a photo and tag me on social media – seeing your creations absolutely makes my day.
If you loved this recipe, don’t forget to subscribe for more easy and delicious bites that will have everyone asking for the recipe!